Need to Remove Customer Portal Access?
There are a few scenarios where you might find it necessary to remove access to the Customer Portal from your valued Customers. These may include:
- You’ve Decided Not to Use the Customer Portal: Perhaps you’ve determined that you’re not quite ready to utilize the Customer Portal included with your Striven plan right now. However, you may have already granted Portal access to some Customers before making this decision.
- You Want to Clean Up Inactive Customer Accounts: Over time, some of your Customers may become inactive. To manage Portal usage and avoid potential extra fees, you might want to remove Portal access for those Customers who are no longer actively engaged with your business.
- A Customer’s Relationship with Your Business Has Ended: In some cases, a Customer’s relationship with your business may come to an end. This could be due to contract termination, a shift in the Customer’s needs, or other circumstances.
Whatever the reason, we’re here to help! The following steps should assist you in adjusting your Customer’s Portal access en masse.
To remove Portal access from ALL of your Customers in Striven, follow these steps:
- Navigate to Reports > Report Builder to create a custom report.

- Click on the blue Plus (+) button to add a new report.

- On the Add Report page, select the Customer/Vendor Contacts Dataset in the Based On field and enter a Name for the report before clicking the Proceed button.

- Next, on the report Info page, locate the Filters panel and click on the Add Filters button to configure the parameters that will limit your report results to only the Contacts for which you wish to remove Portal access.

- Select the following recommended filters and then click Save.
- Customer/Vendor Contact: Has Customer / Enter Value / Equal To / Yes
- Customer/Vendor Contact: Has Access To Portal / Enter Value / Equal To / Yes

- Back on the report Info page, click on the Add button in the Columns panel to search for and add the following columns, and then click the Run Report button.
- Customer/Vendor Contact: ContactId
- Customer/Vendor Contact: Customer: CustomerId
- Customer/Vendor Contact: First Name
- Customer/Vendor Contact: Last Name
- Customer/Vendor Contact: Customer: Name
- Customer/Vendor Contact: Has Access To Portal

- Click on the Export menu on the left side of the page and choose the .CSV option.

- Open the exported .CSV file and change the “Yes” responses in the Has Access To Portal column to “No” for each Contact listed and save your changes. Make sure the file is saved as a .CSV file type.

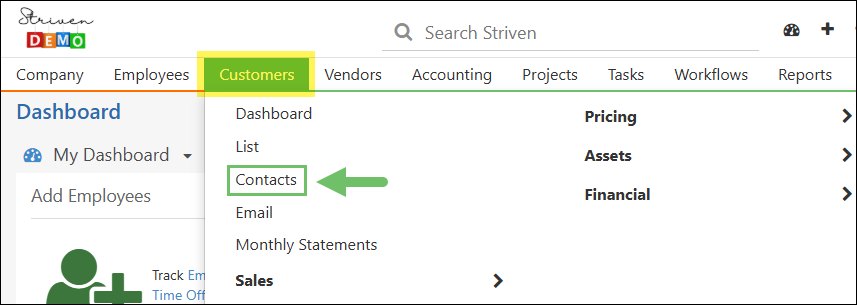
- In Striven, navigate to Customers > Contacts to load the Contacts List page.
- On the Contacts List page click the Import button and choose Contacts.

- On the Contacts Import page, confirm the checkbox for Update matching data is checked.

- Upload the updated .CSV file and click Next.

- Now, you will need to set the Import Mapping. Use the drop-down lists and make sure the Sources are mapped as follows:
- ContactId is mapped to “CONTACT ID”
- Customer: CustomerId is mapped to “CUSTOMER/VENDOR ID”
- First Name is mapped to “FIRST NAME”
- Last Name is mapped to “LAST NAME”
- Customer: Name is mapped to “CUSTOMER/VENDOR NAME”
- Has Access To Portal is mapped to “ALLOW ACCESS TO CUSTOMER/VENDOR PORTAL”

- The Contacts Import Confirmation page will display showing the changes that were made with the import. Click the Finish button to complete the update.

- The Import Progress page will display with a notification that your import is queued and that you will receive an email notification with the import summary once it is completed.

It is recommended that you return to the Report Builder page and run the custom report you created again to confirm the Portal access for Customer Contacts was properly updated.
- Note: If multiple associations were created for a Contact, only one association may have been updated and others may need to manually be set to have no Portal access.
And remember, if you ensure the checkbox for Enable Striven Customer/Vendor Portal Access when Contacts are Added on the Customer/Vendor Portal Settings page is not checked, your Customer/Vendor Contacts will not be automatically provided with Portal access when they are added to your system.
This setting can be found by navigating to Company > Settings > Customers/Vendors > Portal > Settings

The steps above were to guide you through removing Portal access from ALL of your Customers in Striven, but additional report filters may be used to narrow down your list more specifically. This way, you can easily remove access from a more particular group of Customers at one time. For more details related to the Report Builder feature in Striven, check out our Report Builder Guide.
We hope you’ve enjoyed this post and found it useful!! Please contact Striven Support with any questions! ![]()